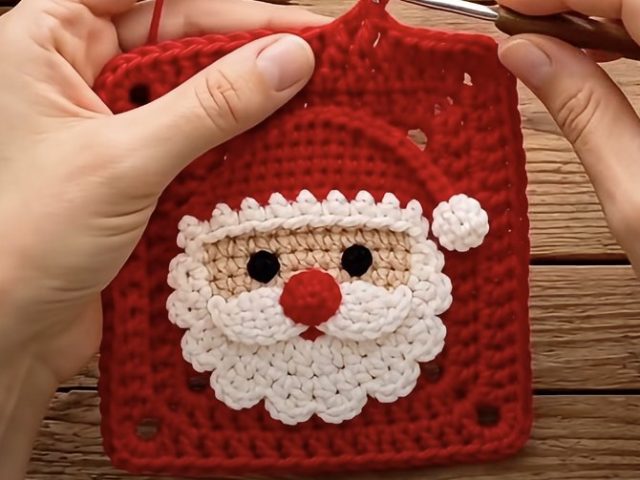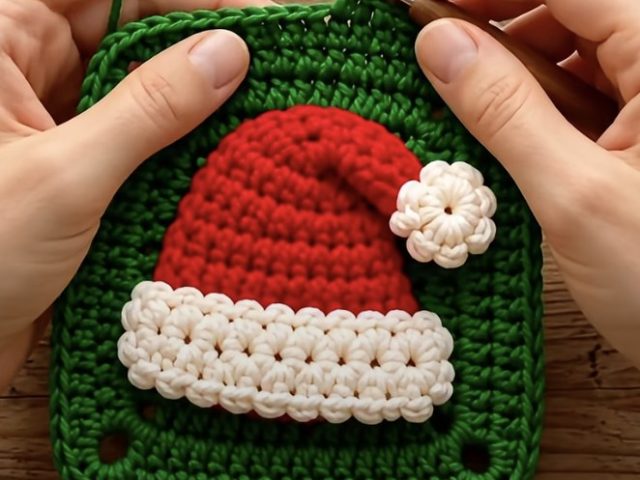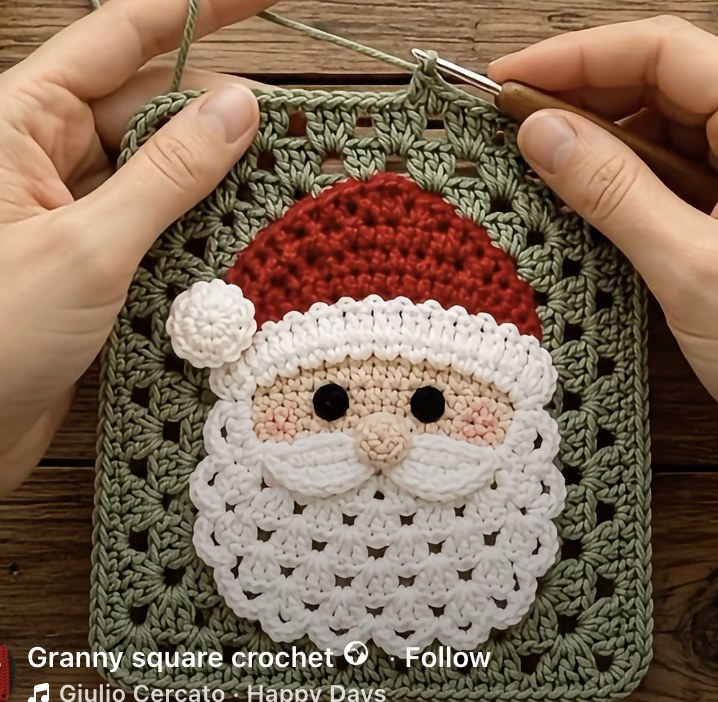
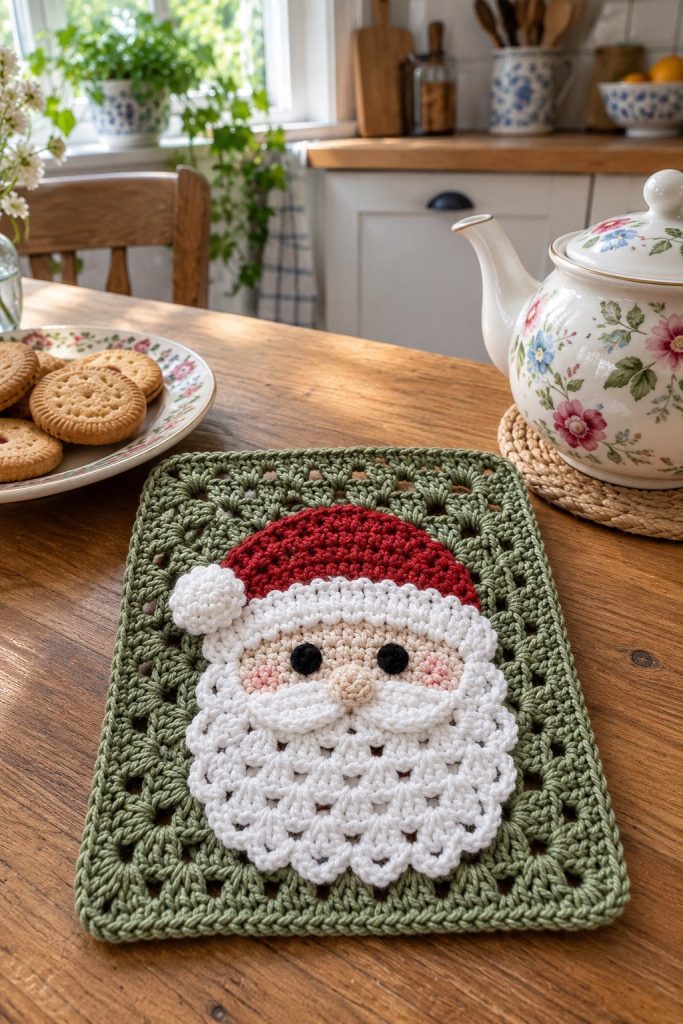
A charming bearded Santa applique worked onto a classic granny square background. This project pairs a textured scallop beard and curled moustache with a cozy red hat and a fluffy pompom — all crochet in soft cotton yarn. The finished panel is perfect as a festive coaster, mug rug, or part of a seasonal blanket. Detailed step-by-step rounds and assembly notes make it easy to recreate this adorable holiday square.
About this pattern
This pattern creates a rectangular granny-square panel with a layered Santa applique — red hat, skin-toned face, round nose, a fluffy white pompom, curled moustache and scalloped beard. The background is a classic granny square constructed in rounds and finished with a smooth single crochet border. The Santa applique is made in separate pieces and sewn to the square for a crisp, dimensional look.
The design uses simple crochet shapes combined with shell stitches for the beard texture and layered single crochet for the face. It suits cotton or cotton-blend worsted (#4) yarn for clear stitch definition and a neat finish.
Why you’ll love this pattern
I love this pattern because it mixes classic granny textures with playful applique details — the scallop beard and tiny pompom give Santa real personality. The separate pieces make it satisfying to assemble, and the finished panel is versatile: a coaster, decoration, or a square for a larger blanket. It's joyful, quick to make, and perfect for gifting at the holidays.
Holiday Cheer 🎄
Festive fun for the season, bringing handmade magic to celebrations and creating new family traditions.
Skill level & time
Ideal for those with basic crochet experience, featuring slightly more advanced stitches and techniques to expand your skills.
Takes 3-5 hours, perfect for an afternoon or evening of relaxing crochet.
Materials & tools
🧶 Yarn & materials
- Worsted weight cotton yarn (#4), approximately 120g in leaf green (background)
- 50-60g in festive red for the hat
- 40-50g in soft white for beard, moustache, brim and pompom
- 20-30g in skin tone (peach/beige) for face and nose
- 10g small amount in black for eyes
- Small scrap (5g) of pink or blush yarn for cheek detail (optional)
🪡 Tools
- 3.5mm (E) crochet hook for main work
- 3.0mm (D) hook for tighter applique shapes (optional)
- Yarn needle for sewing pieces together and weaving ends
- Scissors
- Stitch markers (at least 4)
- Small amount polyester fiberfill for nose and pompom
- Pins or tapestry needles for positioning applique
- Optional: blocking mat and pins
- Optional: fabric glue for extra-secure pompom attachment
Abbreviations
- mr = magic ring
- ch = chain
- sc = single crochet
- hdc = half double crochet
- dc = double crochet
- tr = treble crochet
- sl st = slip stitch
- inc = increase (2 sc in same stitch)
- dec = invisible decrease (sc2tog)
- BLO = back loops only
- FLO = front loops only
- st = stitch
- sp = space
- rep = repeat
- ( ) = work instructions in brackets as directed
- x = times
- sk = skip
The pattern
— Head (Face Disc) :
Round 1 : 6 sc in magic ring (6)
Round 2 : 6 inc (12)
Round 3 : (1 sc, 1 inc) x 6 (18)
Round 4 : (2 sc, 1 inc) x 6 (24)
Round 5 : (3 sc, 1 inc) x 6 (30)
Round 6 : (4 sc, 1 inc) x 6 (36)
Round 7 : (5 sc, 1 inc) x 6 (42)
Round 8 : (6 sc, 1 inc) x 6 (48)
Round 9-12 : 1 sc in each st (48)
Info : Work these rounds tightly to produce a flat disc for the face. This disc will sit under the hat and above the beard. Place stitch marker at the first stitch of every round to keep track.
Round 13 : (6 sc, 1 dec) x 6 (42)
Round 14 : (5 sc, 1 dec) x 6 (36)
Info : If you prefer a slightly fuller rounded face instead of a perfectly flat disc, stop decreases earlier (leave at 42 sts). This pattern takes it to 36 to create a neat edge that aligns with the beard placement.
Round 15 : (4 sc, 1 dec) x 6 (30)
Round 16 : (3 sc, 1 dec) x 6 (24)
Info : Fasten off leaving a long tail for sewing the face disc to the square. Do not stuff — this is a flat applique. If you want the face to have slight dimension, stuff very lightly before final close at round 16 and use tail to sew closed.
— Hat (Red Cap) :
Info : Using red yarn. The hat is worked as a shallow dome that sits behind the top of the face disc and above the brim. For a tidy join, place the hat so that its final round matches the top edge of the face disc.
Round 1 : 6 sc in magic ring (6)
Round 2 : 6 inc (12)
Round 3 : (1 sc, 1 inc) x 6 (18)
Round 4 : (2 sc, 1 inc) x 6 (24)
Round 5 : (3 sc, 1 inc) x 6 (30)
Round 6 : 1 sc in each st (30)
Round 7 : 1 sc in each st (30)
Round 8 : (5 sc, 1 dec) x 5 (25)
Round 9 : 1 sc in each st (25)
Round 10 : 1 sc in each st (25)
Info : These rounds result in a shallow cap shaped to tuck behind the face and create a visible red top. Adjust increases/decreases to fit your face disc proportionally. If your face disc was left at 42 stitches, align this hat so its final row measures approximately the same width when stretched gently.
Round 11 : Fasten off leaving long tail for sewing the hat to the face. Optionally make the hat slightly oval by adding 2 extra sc evenly across one side and decreasing two on the opposite side to produce the slouch.
— Hat Brim (White) :
Info : Worked separately in white yarn to create the thick brim that sits over the forehead. We will join the brim to the hat and face with whip stitch.
Round 1 : Attach white yarn to the base edge of the hat. Ch 1, 1 sc in next 12 sts evenly across center front, then ch 3 (counts as turning), turn to work back across in rows for a folded brim effect
Round 2 : Work 1 sc in each st across foundation row (12)
Round 3 : Fold brim over so work is layered; slip stitch through both layers across to create a thick brim (12)
Round 4 : Working along the folded edge, sc evenly around the brim edge to produce a clean finish (12)
Info : Use a tight tension so the brim keeps its structure. If you prefer a more fluffy brim, work 2 sc in each st for a fuller roll.
— Pom Pom (Hat Bobble) :
Round 1 : Using white yarn: 6 sc in magic ring (6)
Round 2 : 6 inc (12)
Round 3 : (1 sc, 1 inc) x 6 (18)
Round 4 : 1 sc in each st (18)
Info : Lightly stuff the pompom with fiberfill and close by sewing the center. The pompom is sewn to the tip or side of the hat depending on preference. Make sure to leave long sewing tail to attach securely to the hat brim or edge.
Round 5 : Fasten off leaving long tail for sewing. Secure by weaving the tail through the rounds and knotting inside the pompom.
— Nose (Small 3D Bulb) :
Round 1 : Using skin tone yarn: 6 sc in magic ring (6)
Round 2 : 6 inc (12)
Round 3 : (1 sc, 1 inc) x 6 (18)
Round 4 : 1 sc in each st (18)
Info : Stuff lightly to form a rounded nose. You want a subtle bulb that sits centered between the eyes and above the moustache; do not overstuff or it will sit awkwardly on the face disc.
Round 5 : (1 sc, 1 dec) x 6 (12)
Round 6 : 6 dec (6). Fasten off leaving a long tail for sewing. Use tail to sew nose to the center of the face disc between rounds 11–12 of the face (or visually center on final dimension).
— Eyes (Make 2 Small Discs) :
Round 1 : Using black yarn: 6 sc in magic ring (6)
Round 2 : 6 sc in each st (6) — keep small and dense
Info : Alternatively use 8mm safety eyes — position between rounds 11–13 of the face disc, approximately 6-8 stitches apart for a balanced expression. If using sewn discs, fasten off leaving tail to sew in place; place a dab of glue if needed.
— Cheeks (Optional Blush) :
Info : Use a tiny scrap of blush or pink yarn to embroider small circular blushes centered on the face disc beside the nose. Another option is to use fabric-safe chalk/blush gently applied with a cotton swab for soft color.
— Moustache (Make 2 Curled Tabs) :
Info : Two elongated tabs are worked flat and attached below the nose to create a curled moustache. Work in white yarn with a slightly smaller hook for definition.
Round 1 : Ch 10, sc in 2nd ch from hook and across to end (9)
Round 2 : Ch 1, turn, sc across (9)
Round 3 : Ch 1, turn, sc 3, hdc 3, sc 3 (9)
Round 4 : Ch 1, turn, sc across (9). Fasten off leaving long tail for sewing. Make mirror second piece.
Info : Sew moustache pieces to the face immediately under the nose. Slightly curve them upward at the outer ends by sewing only the inner side firmly and leaving the outer edge freer so they curl naturally.
— Beard (Large Scalloped Panel) :
Info : The beard is worked as a fan/scallop shaped semi-circle using shells and short rounds to create a layered texture. It begins as a half-disc that will be sewn to the lower edge of the face disc so the moustache sits on top.
Round 1 : 6 sc in magic ring (6)
Round 2 : 6 inc (12)
Round 3 : (1 sc, 1 inc) x 6 (18)
Round 4 : (2 sc, 1 inc) x 6 (24)
Round 5 : (3 sc, 1 inc) x 6 (30)
Round 6 : (4 sc, 1 inc) x 6 (36)
Round 7 : (5 sc, 1 inc) x 6 (42)
Round 8 : (6 sc, 1 inc) x 6 (48)
Info : After you reach 48 stitches you will start working rows of shell stitches across the semicircle to create scallops. The base 48 sts will act as the anchor round. Work all beard rounds with white yarn. Keep tension slightly loose to let scallops relax.
Round 9 : Ch 3 (counts as dc), *sk 1, 5 dc in next st (shell), sk 1, dc in next st* repeat across to last st. End with dc in last st. This creates approximately 12 shells across the row (48 base sts / 4)
Round 10 : Turn, ch 3, shell (5 dc) in center dc of each shell below to build second scallop row. Aim for 12 shells across.
Round 11 : Repeat Round 10 (12 shells)
Info : For a fuller beard add extra shell rows until you reach desired length. Typically 6–8 scallop rows create the layered beard seen in the image. Keep shells centered on the shells below so rows stack and create a lace-like scallop texture.
Round 12 : Repeat Round 10 (12 shells)
Round 13 : Repeat Round 10 (12 shells)
Round 14 : Repeat Round 10 (12 shells)
Round 15 : Repeat Round 10 (12 shells)
Round 16 : Repeat Round 10 (12 shells)
Info : To create the scalloped lower edge finish, work a picot-like edging: *sc in next dc, ch 3, sl st in 3rd ch to form each scallop point* across final row to create the neat scalloped outline shown in the photo.
Round 17 : Edging: *sc in next dc, ch 3, sl st in 3rd ch (picot)* across to end. Fasten off leaving long tail to sew beard to face disc
— Granny Square Background (Main Panel) :
Info : Work the background granny in leaf green yarn. This square is worked in joined rounds with corners made of 3-dc clusters separated by ch-2 corner spaces. Size of the square in photos is approximately 10 x 14 cm (4 x 5.5 in) depending on yarn and tension; adjust rounds to fit your finished Santa applique.
Round 1 : Ch 4, sl st to first ch to form a ring. Ch 3 (counts as dc), 2 dc into ring, ch 2, (3 dc into ring, ch 2) x 3, join with sl st to top of starting ch-3 — you will have 4 corner clusters and 4 ch-2 corner spaces
Round 2 : Sl st into next 2 dc to sit into ch-2 corner sp, ch 3, 2 dc, ch 2, 3 dc in same corner sp, ch 1, *(3 dc, ch 2, 3 dc) in next corner sp, ch 1* repeat around, join with sl st to top of starting ch-3
Round 3 : Repeat Round 2, increasing the number of (3 dc clusters) between corners by working 3-dc clusters in each ch-1 space across the sides. Typical sequence results in 3 clusters per side plus the corner clusters.
Round 4 : Repeat and expand: ch 3, 2 dc, ch 2, 3 dc in corner, ch 1, 3 dc in each side ch-1 space across, ch 1 between cluster groups, join
Round 5 : Repeat Round 4 expanding evenly so each side has an additional 3-dc cluster group compared to previous round. This builds the square outward. Typical square in the photo is about 6–7 granny rounds before a neat rectangle shaping technique; continue until square measures approximately 12–14 cm tall to accommodate the tall Santa applique.
Info : If you prefer a rectangular base like the photo, work extra rows on the top and bottom (working even clusters along those sides) to elongate the square into a rectangle. Keep stitch counts balanced on left/right edges so corners remain square.
Round 6-9 : Continue building granny rounds as in Round 5 (each round increases the number of cluster groups along each side by 1). Join each round with sl st and maintain clean corner ch-2 spaces.
Round 10 : When the panel is the desired height (measuring against your Santa applique), stop increasing and work one round of 3 dc clusters into each cluster group but omit adding extra cluster groups — this evens the sides.
Round 11 : Work a final round of single crochet around the entire square to neaten edges: sc evenly into each dc and 3 sc into each corner ch-2 space. Join and fasten off.
Info : Block the square lightly on a flat surface to square up edges before attaching applique. Pin the Santa elements in place to check proportions: hat near top center, beard overlapping bottom edge of face disc, nose and moustache positioned as described in assembly notes.
— Border Finish :
Round 1 : With green yarn and 3.5mm hook, join at any corner, ch 1, sc 3 into corner ch-2 space, *sc in each dc across until next corner, sc 3 in corner ch-2 space* repeat around, join (this rounds corners smoothly)
Round 2 : Ch 2, hdc in each sc around to produce a slightly raised final border. Join and fasten off. Weave in ends.
Info : For a subtly rounded corner shown in the image, work 3 sc into each corner space and decrease/increase across the side to keep corners soft. A final slip-stitch round gives a tidy fabric edge for display.
— Extra Decorative Surface Details :
Round 1 : To make rosy cheeks use a small tight spiral of blush yarn: ch 2, 6 sc in 2nd ch from hook, sl st to join (6). Attach with single stitch at cheek position then thread tail across the back to secure and hide.
Info : You can also use embroidery floss to add simple lines for eyebrows or a smile. A thin tan yarn can be used to embroider subtle nostril line below the nose for added character.
— Assembly & Sewing Prep :
Info : Lay your blocked granny panel flat and arrange the face, hat, beard, moustache, nose and pompom before sewing. Pin each piece. The face disc should sit slightly above the vertical center of the panel with the beard covering the lower quarter.
Round 1 : Sew hat to the top edge of the face disc using mattress stitch or whip stitch through the last round of the hat and the corresponding outer edge of the face disc. Hide tails inside hat.
Round 2 : Position beard so its top rounds align with rounds 15–16 of the face disc and sew through both layers in short even stitches. Use long tail from beard to secure solidly across entire top seam.
Round 3 : Sew moustache pieces across beneath the nose, stitching close to the face disc so the moustache lays on top of the beard. Secure outer tips with a couple of stitches to achieve curled lift.
Round 4 : Sew nose centered between eyes and above moustache. Use invisible stitches at the base to sink the nose slightly against the face disc. Knot and weave ends internally to avoid bulk.
Round 5 : Sew pompom to the hat tip or side with strong sewing thread or hidden yarn tail. Reinforce with fabric glue if desired and let dry thoroughly.
Info : Use small backstitches and secure knots inside the applique layers so nothing comes loose during use. Trim ends close after weaving them through several stitches for durability.
Assembly
- Place the blocked granny square on a flat surface and position the face disc centered horizontally and slightly above center vertically so beard covers lower area. Pin in place before stitching.
- Sew the hat brim and body to the top edge of the face disc using a whip stitch through both pieces, ensuring the brim covers the forehead evenly and hides join stitches.
- Attach the beard by aligning its top round with the lower edge of the face disc (rounds 14–16 region). Use a tapestry needle and long tail to sew through both fabric layers using small, even stitches.
- Sew the moustache pieces just below the nose and above the beard. Anchor the inner edges firmly and leave the outer edges a little freer to create a slight curl.
- Position and sew the nose between the eyes and above the moustache; sew through the face disc firmly. For 3D stability add a couple of stitches through the granny square backing under the nose if needed.
- Attach pompom to the hat edge (side or top) with several secure stitches. If panel will be handled often, reinforce with a drop of fabric glue after sewing and allow to dry.
- Sew on small black eye discs or secure safety eyes (if using) between rounds 11–13 of the face disc, spacing about 6–8 stitches apart. If using discs, tack them down with a couple of stitches for permanence.
- Weave all ends inside the applique layers and into the granny fabric, trimming close. Block lightly again to set final shape and ensure all pieces lie flat.
💡 Important notes
- Use stitch markers consistently at the beginning of each round to avoid counting errors and maintain proper shaping.
- Work applique slightly tighter than your background square to prevent it from buckling when sewn on; cotton yarn tolerates being worked a touch tighter.
- Pin all pieces in position and step back to check symmetry before permanent sewing; small adjustments pre-sewing save undoing later.
- Stuff pompom and nose very lightly; heavy stuffing will distort the flat look of the panel.
- When using safety eyes, secure them before attaching the face disc to the square. For toys intended for small children, sew embroidered eyes instead of using safety eyes.
- Weave long tails through several rows of stitches for extra security instead of relying solely on knots at the surface.
- Block the granny square flat to square up corners before attaching applique to ensure alignment.
- If you see puckering after sewing, remove a few stitches and adjust tension or add additional reinforcement stitches to smooth the join.
⚠️ Common mistakes to avoid
- Skipping stitch markers at round starts can cause misaligned corners or asymmetric applique placement; mark every round start.
- Using a loose tension for the applique pieces can cause them to sag when sewn onto the square; work slightly tighter than your usual gauge.
- Not blocking the granny square before attaching the applique may make edges look uneven; block lightly and pin before sewing.
- Sewing the applique with long visible gaps leads to wobble; use small mattress or whip stitches and weave tails securely.
- Placing eyes too close together changes expression; center them evenly and check spacing against photographed reference before securing.
- Carrying yarn without securing color changes can create visible floats; fasten off or weave in ends neatly at color changes.
- Overstuffing a pompom or nose makes them look lumpy; add only light stuffing to maintain a subtle 3D shape.
- Failing to count stitches when shaping the face will create uneven curvature; recount after increases or decreases to confirm totals.
Make it your own
I love how this Bearded Santa panel can be personalized in so many ways — try a pale blue background for a wintery look, or a cream border for a vintage vibe. You can scale the entire design up by using a bulkier yarn and larger hook to create a cushion front instead of a mug rug.
I often change the beard texture by adding extra shell rows or switching to a loop stitch for a fluffy look. If you prefer a simpler finish, embroider the moustache lines instead of crocheting separate pieces — both approaches look wonderful.
Try themed variations: Santa with spectacles using a thin wire and gold thread, or a Santa with a patterned hat by switching colors every other round in the hat dome. I encourage you to experiment and make this design your own.
Frequently asked questions
What is the finished size of this granny square panel?
Using worsted cotton and a 3.5mm hook, the finished panel measures approximately 4 x 6 inches (10 x 15 cm). Using bulkier yarn or a larger hook will increase the final size proportionally.
Can I use acrylic yarn instead of cotton?
Yes. Cotton gives crisp stitch definition ideal for the beard scallops, but acrylic works well and may feel softer. Adjust the hook slightly smaller than recommended to keep stitches dense enough for applique.
Do I need to stuff any parts?
Only the pompom and nose use a small amount of polyester fiberfill. The rest of the applique is flat and should not be heavily stuffed.
Can I make the panel larger for a blanket?
Absolutely. Increase the number of granny rounds in the background to match a larger applique size, or use multiple Santa squares joined together to make a festive throw.
How do I secure the pompom firmly?
Sew the pompom with several stitches through its center into the hat using a strong yarn tail. For extra hold, add a small dab of fabric glue under the stitches and let it dry fully.
What if my stitch counts are off?
If counts don't match, unravel back to the last round where count was correct and rework. Use stitch markers for the first stitch of each round to avoid errors. Small variations are tolerable for applique pieces but keep rounds balanced for symmetry.
Can I embroider additional facial features?
Yes, embroidered smiles, eyebrows, or blush accents are a beautiful way to add expression. Use stranded cotton or thin yarn and stitch gently to avoid puckering.
How much yarn will I need in total?
Approximately 250–300g total across all colors for a single panel (mainly depending on how many granny rounds you work and the density of the beard). The recipe in the materials section offers a practical estimate.
Finishing this Bearded Santa Granny Square is such a joyful moment — the scalloped beard and curly moustache give him so much charm, and the green granny frame provides a cozy vintage feel. This small panel makes a lovely mug rug, gift tag, wall hanging, or joinable blanket square. 🎁🧶 Enjoy stitching every little detail and sharing this cheerful Santa with friends and family. Happy hooking and merry making! 🎄