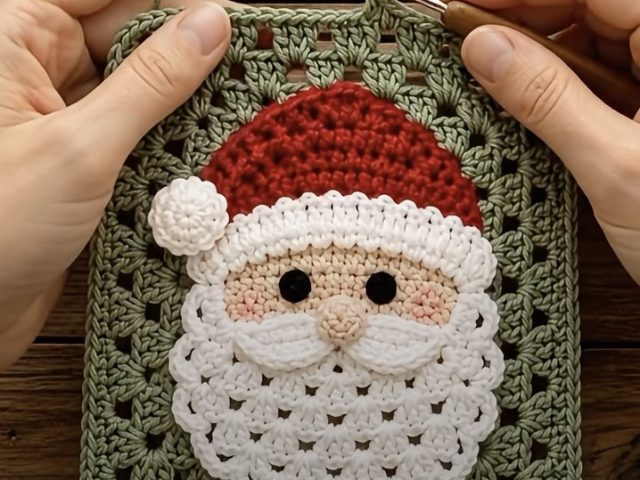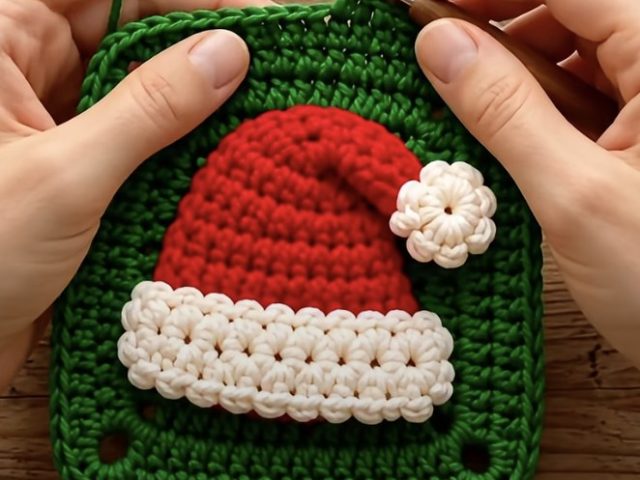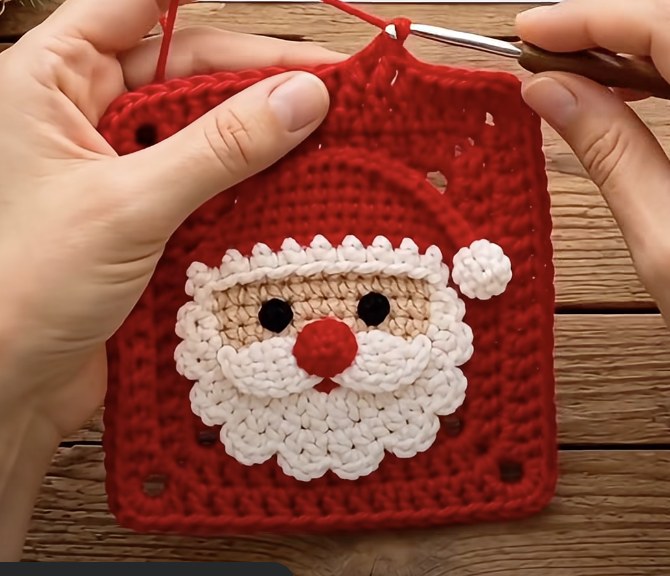
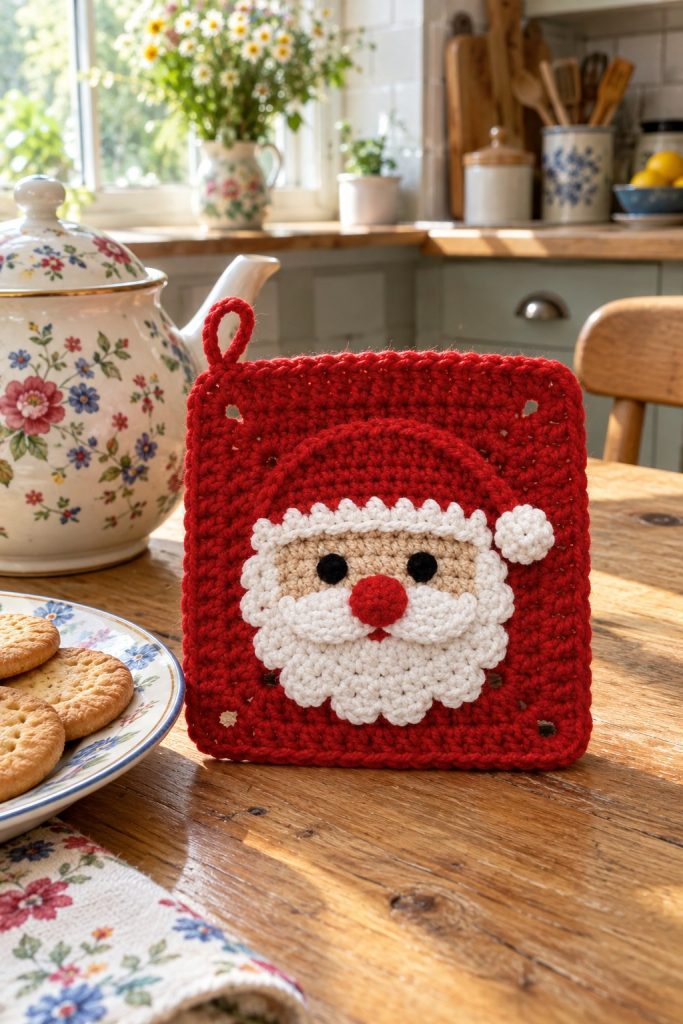
A festive Santa Claus granny square with a layered applique face — perfect as a potholder, festive coaster, or mini wall-hanging. This pattern shows a round Santa face with a red hat, beige face, fluffy white beard and moustache, a red pompom and nose, plus a neat hanging loop. Written for worsted weight yarn with clear step-by-step rounds and helpful Info tips to guide you through every stage.
About this pattern
This Santa Claus Granny Square pattern creates a cheerful, layered applique of Santa's face on a solid red square background. You will make a small circular face (beige), a scalloped white beard and moustache, a red hat and pompom, plus a red nose and black eye discs. The finished square is great as a potholder, small trivet, mug rug, or seasonal decoration.
The pattern uses basic stitches (sc, inc, dec, shell) and finish details with sewn-on pieces for a dimensional look. A hanging loop and a tidy border complete the project for immediate display or gifting.
Why you’ll love this pattern
I love this pattern because it combines classic granny-square charm with a sweet, dimensional Santa applique that really pops. The scalloped beard and little pompom give it a handcrafted, cozy look — perfect for holiday displays or small handmade gifts. I also appreciate how the construction is modular, so you can make the square and applique separately and assemble them neatly.
Holiday Cheer 🎄
Festive fun for the season, bringing handmade magic to celebrations and creating new family traditions.
Skill level & time
Ideal for those with basic crochet experience, featuring slightly more advanced stitches and techniques to expand your skills.
Takes 3-5 hours, perfect for an afternoon or evening of relaxing crochet.
Materials & tools
🧶 Yarn & materials
- Worsted weight yarn (#4), approximately 120g in red (main background and hat)
- 50-60g in white (beard, moustache, pompom, hat trim)
- 30-40g in light beige / skin tone (face disk)
- Small amounts (10-15g) in black (eye discs) and bright red (nose if separate color is desired)
🪡 Tools
- 3.5mm (E) crochet hook for main work (or size to obtain gauge and tight fabric)
- 3.0mm (D) hook for smaller detail pieces and tighter stitches (optional)
- Small tapestry/yarn needle for sewing applique pieces
- Scissors
- Stitch markers (at least 4)
- Blocking pins and small blocking mat (optional for flattening pieces)
- Measuring tape or ruler
- Optional: small amount of polyester stuffing or fiberfill (tiny bit for nose/pompom)
- Optional: fabric glue for extra-secure pompom or nose attachment
Abbreviations
- mr = magic ring
- ch = chain
- sc = single crochet
- hdc = half double crochet
- dc = double crochet
- sl st = slip stitch
- inc = increase (2 sc in same stitch)
- dec = invisible decrease (sc2tog)
- BLO = back loops only
- FLO = front loops only
- st(s) = stitch(es)
- sk = skip
- rep = repeat
- ( ) = work instructions in brackets as directed
- x = times
The pattern
— Face / Head (beige disk) :
Round 1 : 6 sc in magic ring (6)
Round 2 : 6 inc (12)
Round 3 : (1 sc, inc) x 6 (18)
Round 4 : (2 sc, inc) x 6 (24)
Round 5 : (3 sc, inc) x 6 (30)
Info : Work tightly so the fabric is solid; this circular face will later be layered with beard and hat. Use stitch marker at first stitch of each round.
Round 6 : (4 sc, inc) x 6 (36)
Round 7 : (5 sc, inc) x 6 (42)
Round 8 : (6 sc, inc) x 6 (48)
Round 9-14 : 1 sc in each st (48)
Info : Place markers for eye placement: standard placement is between rounds 12 and 13 (count from center) and approx 8 stitches apart. Mark the two eye positions now using small scrap yarn or pins on the right side.
Round 15-20 : 1 sc in each st (48) — work even to build face height (6 rounds)
Info : If you prefer a flat disc (no decreases), stop here and fasten off leaving long tail for sewing. For a slight dome (subtle shaping), continue with the decrease rounds shown below to taper towards the neck area of the applique.
Round 21 : (6 sc, 1 dec) x 6 (42)
Round 22 : (5 sc, 1 dec) x 6 (36)
Info : Begin very light stuffing if you want a slightly padded applique (not necessary for most flat projects). Use a tiny amount of fiberfill only if creating a slightly raised face.
Round 23 : (4 sc, 1 dec) x 6 (30)
Round 24 : (3 sc, 1 dec) x 6 (24)
Round 25 : (2 sc, 1 dec) x 6 (18)
Round 26 : (1 sc, 1 dec) x 6 (12)
Round 27 : 6 dec (6)
Info : Fasten off leaving a 20-25 cm (8-10 in) tail for sewing. If you opted for a flat disk, fasten off at round 14-20 instead and leave a long tail.
— Beard (white scalloped applique) :
Round 1 : 6 sc in magic ring (6)
Round 2 : 6 inc (12)
Round 3 : (1 sc, inc) x 6 (18)
Round 4 : (2 sc, inc) x 6 (24)
Info : The beard is worked flat as a slightly elongated semicircle. This inner circle will be trimmed into scalloped shells in later rounds to get the fluffy shape you see in the photo.
Round 5 : (3 sc, inc) x 6 (30)
Round 6 : (4 sc, inc) x 6 (36)
Round 7 : 1 sc in each st (36)
Info : To make scallops that imitate curls, we will work a row of shell stitches along the lower edge. Identify the lower half: fold circle flat and mark 12-14 stitches that will become the beard edge. Work shells into those stitches only.
Round 8 : *Shell into next st: (dc, dc, dc, dc, dc) into same st, sk 1 st, sc into next st; rep across the lower 12-14 sts to create scallops (number of shells will vary depending on how large you want the beard)*
Round 9 : Work a tidy sc round around the entire beard piece to even the edge: 1 sc in each st and in tip of each shell (st count approx 36-48 depending on shells)
Info : Fasten off and leave long tail for sewing. Block the beard lightly to shape the scallops so they sit nicely when attached to the face disk.
— Moustache (make 2 mirrored pieces or 1 split piece) :
Round 1 : 6 sc in magic ring (6)
Round 2 : 6 inc (12)
Round 3 : (1 sc, inc) x 6 (18)
Round 4 : 1 sc in each st (18)
Round 5 : Shape outer edge by working shells across the outer 6-8 stitches to create curl: *(dc, dc, dc) in next st, sl st in next; rep across the outer half*
Info : Make two identical pieces and leave long tails for sewing. Position them slightly above the beard so they meet in the middle under the nose.
— Nose (small red puff) :
Round 1 : 6 sc in magic ring (6)
Round 2 : 6 inc (12)
Round 3 : (1 sc, inc) x 6 (18)
Round 4 : 1 sc in each st (18)
Info : Use a small amount of fiberfill to shape the nose lightly. Fasten off leaving 20-25 cm tail for sewing onto face. Alternatively, embroider a flat circle using a small red yarn rose technique if you prefer a flat nose.
— Eyes (make 2, black) :
Round 1 : 6 sc in magic ring (6)
Round 2 : 6 inc (12)
Round 3 : Slip stitch around to tidy and fasten off leaving tail for sewing. Alternatively use 8–10 mm safety eyes positioned on face between rounds 12–13 of the head disk (approx 8 stitches apart).
Info : When using safety eyes, insert before attaching the face disk to the background so the shanks can be secured behind the face. If using sewn-on black discs, sew through from wrong side with long tail and knot securely.
— Hat (red semicircle with white brim) :
Round 1 : 6 sc in magic ring (6)
Round 2 : 6 inc (12)
Round 3 : (1 sc, inc) x 6 (18)
Round 4 : (2 sc, inc) x 6 (24)
Round 5 : (3 sc, inc) x 6 (30)
Round 6 : 1 sc in each st (30)
Round 7 : 1 sc in each st (30)
Info : This shape will be flattened and positioned over the top portion of the face disk. You can make the hat slightly taller by adding 2-4 extra even rounds (sc in each st) if you want a larger hat brim.
Round 8 : Work a contrast brim in white: change to white yarn at beginning of this round. (BLO or FLO technique optional) 1 sc in each st (30)
Round 9 : Work a decorative edge on brim: *(ch1, sk 1, sc) across to create tiny picot appearance; adjust to fit (approx 30 sts)
Info : Fasten off red and white as needed, leaving tails for sewing. Block the hat flat so it curves slightly and matches face width before sewing into place.
Round 10 : If you want a more domed hat, add 1-2 rounds of hdc across (30-36 sts) and then finish brim as above.
— Pompom (white) :
Round 1 : 6 sc in magic ring (6)
Round 2 : 6 inc (12)
Round 3 : (1 sc, inc) x 6 (18)
Round 4 : 1 sc in each st (18)
Round 5 : Optional: gather with a running stitch and stuff slightly, or make traditional pompom separately and sew on. Fasten off leaving long tail for sewing.
— Santa Nose & Expression finishing (placement info) :
Info : Position the nose centrally on the face disk immediately below the eye line and above where the moustache halves meet (usually approximately on round 11–13 area of the face disk). Temporarily pin or baste the nose with tail to test placement before sewing.
Info : Position the beard so the scalloped edge sits below the nose and covers the lower portion of the face disk. The moustaches are placed slightly above the top of the beard and curve to the sides. The hat brim should overlap the top few stitches of the face disk giving the impression of the hat sitting on the head.
— Background Square (red solid square) :
Round 1 : 6 sc in magic ring (6)
Round 2 : 6 inc (12)
Round 3 : (1 sc, inc) x 6 (18)
Round 4 : (2 sc, inc) x 6 (24)
Round 5 : (3 sc, inc) x 6 (30)
Round 6 : (4 sc, inc) x 6 (36)
Round 7 : (5 sc, inc) x 6 (42)
Round 8 : (6 sc, inc) x 6 (48)
Info : We begin with a circular base that will be converted into a square by carefully placing increases that form corner points. Keep stitch marker at the start of each round.
Round 9 : (12 sc, inc) x 4 — work pattern in four segments to begin forming corners (52)
Round 10 : (13 sc, inc) x 4 (56)
Round 11 : (14 sc, inc) x 4 (60)
Round 12 : (15 sc, inc) x 4 (64)
Info : At these rounds you are spacing increases evenly into four sections to encourage four gentle bulges which will become the corners. From here we will start defining flat sides between the corners by working multiple sc along the sides.
Round 13 : 1 sc in each st (64)
Round 14 : 1 sc in each st (64)
Round 15 : Mark four corner points: locate the four increase clusters from previous rounds. For this round we’ll make subtle corner shaping: *(sc in next 14 sts, (sc, ch2, sc) in corner st)* x 4 (adds ch2 corners)
Round 16 : 1 sc in each st and sc in each chain-2 space across the four sides (approx 68 sts depending on spacing)
Info : If you prefer a crochet potholder style with small hole detail in corners (as pictured), replace chain-2 corners with chain-3 loops or mini eyelets every few rounds so that small holes show at corners. The photo shows small square holes approximately two rounds in from the edge.
Round 17 : 1 sc in each st (work even across entire round) — this smooths the square face (st count same as previous)
Round 18 : 1 sc in each st (work even) — continue until your square measures roughly the same width as the assembled Santa applique (add rounds as needed)
Round 19-24 : 1 sc in each st (maintain even rounds) — these rounds build the background to desired size. If you need a 16–18 cm (6–7 in) square, stop after about 24 rounds total; add or remove rounds for size preference.
Info : Check the size periodically by holding the Santa face over the background to ensure it sits visually centered. The example image has the Santa face centered vertically and horizontally with small corner eyelets visible.
Round 25 : To create the little corner eyelets: ch 3 at corner instead of sc in corner stitch, skip 2 sts, join with sc in next st; repeat for all corners (this produces small holes)
Round 26 : 1 sc in each st (including working into ch-3 spaces) to tidy the round
Round 27 : 1 sc in each st — prepare for border finish (keep even)
Info : Fasten off the background and weave in ends, or continue directly to border rounds below if you prefer a seamless finish.
— Border & Hanging Loop :
Round 1 : Join red yarn at any edge stitch. 1 sc in each st around working 3 sc in each corner (into the ch-2 or ch-3 spaces) to ensure a neat square corner. (st count approx same as previous + corner increases)
Round 2 : 1 sc in each st around — tidy border (work even)
Round 3 : Optional decorative ridge: 1 sc in BLO across entire round to create a subtle ridge (work even)
Info : Hanging loop: decide which corner you want the loop. On the next round, when you reach that corner, ch 15–20 (depending on desired loop size), sl st into same corner to form a loop. Continue the round and finish border.
Round 4 : After creating loop in corner, finish the round with 1 sc in each st. Fasten off and weave in ends securely.
Info : Block the entire square lightly if desired to square up corners. I like to pin the square square and spray lightly with water; allow to dry flat for crisp edges.
— Assembly & Sewing Instructions (applique to background) :
Info : Arrange the face, beard, moustache, hat and pompom on the background before sewing. The face disk center should be approx 7-9 rounds from the top edge of the background square if your square is 24 rounds deep; adjust as needed for your size.
Info : Use pins or small safety pins to hold pieces; when satisfied with placement, use the long tails left on pieces to whip stitch or invisible-stitch attachments from the wrong side. Use matching yarn color for near-invisible joins.
Round-like Steps : Sew the beige face disk first, then position and sew the brim of the hat so it slightly overlaps the top of the face. Sew the beard next so the scallops follow the lower face curve, then sew moustache halves, and finally sew the nose and pompom on top, adding a tiny dab of glue if you like for extra security.
Info : For a tactile look, sew the hat brim only in a few strategic points so the brim sits slightly lifted. Sew through face and brim with several passes to ensure stability when laundered occasionally (if the yarn allows).
Finishing : Weave in all tails at the back, trim neatly, and optionally block the assembled square once more so all layers sit flat and neat.
Assembly
- Position the face disk on the background square about 7–9 rounds down from the top; pin in place with fine pins to ensure perfect centering before you begin sewing.
- Sew the face to the background with the long tail: use whip stitch or invisible mattress stitch around the edge every 4–6 stitches, pulling slightly to flatten and secure the disk.
- Position the white beard so its scalloped edge overlaps the lower edge of the face by 1–2 rounds; baste in place and then sew with matching white yarn using small concealed stitches.
- Sew the moustache halves above the beard centered under the nose; secure with several passes of yarn and hide tails behind the beard.
- Attach the red nose in the center using the tail from the nose piece; stuff lightly if needed and sew through to the background for strength.
- Attach the hat brim and then the hat body at the top of the face; position the pompom at the hat tip and sew firmly through the pompom base into hat and background.
- Create the hanging loop in the corner: if you made a loop during the border, reinforce the base by sewing a few extra stitches through the corner to the back for durability.
- Weave all ends through the wrong side for security and trim close. Optionally add a small dab of fabric glue at the base of the pompom and nose for extra security.
💡 Important notes
- Use stitch markers consistently at the beginning of each round to avoid counting errors and maintain proper shaping.
- Stuff small pieces (nose, pompom) only lightly so they are easy to sew; heavy stuffing will distort applique edges.
- When changing colors, carry the yarn neatly or fasten off to avoid unsightly floats across the RS of your work.
- Block applique pieces flat before assembly to ensure neat edges and accurate placement on the square background.
- Sew pieces with matching yarn colors for almost invisible joins; use a thinner yarn or doubled thread in the needle if needed.
- If using safety eyes, insert and secure them before sewing the face disk to the background so you can reach the shank area.
- Keep tension consistent throughout the square rounds; slight tension changes during border rounds can make corners warp.
- Reinforce the hanging loop with extra stitches and a few passes of yarn for a secure finish if the piece will be hung frequently.
⚠️ Common mistakes to avoid
- Skipping stitch markers at round starts can cause misaligned corners and uneven rounds; always place a marker and move it each round.
- Ignoring consistent tension when switching between colors creates uneven edges; practice carrying yarn or fastening off neatly.
- Sewing applique pieces before blocking them flat makes alignment harder; block pieces lightly first for accurate positioning.
- Overstuffing small appliques like the pompom or nose makes sewing awkward; use tiny amounts and shape gradually.
- Placing safety eyes too low or too close together alters expression; mark placement on the face before attaching permanently.
- Not weaving in ends securely at the back allows pieces to loosen over time; weave through several stitches and knot if needed.
Make it your own
I love how adaptable this Santa granny square is — I often change up the hat color or skin tone to create different looks. The basic shapes are simple to resize by adding or removing rounds, so if I want a larger trivet I just build extra background rounds.
I also enjoy switching the beard texture: sometimes I make tighter shells for a more compact look or use a fluffier yarn in white for a shaggy beard effect. Try adding a tiny embroidered smile or rosy cheek using blush or yarn for personality.
If I want a hanging ornament, I reduce background rounds and make a smaller loop; for potholder use I add two layers and stitch them together for extra insulating thickness. Making small variations keeps the pattern fresh and fun.
Frequently asked questions
What is the finished size of this Santa granny square?
Based on worsted weight yarn and the hook sizes listed, the finished square will be approximately 16–18 cm (6–7 inches) square. Adjust by adding or removing background rounds for a different size.
Can I use different yarn weights for this pattern?
Yes — you can use other yarn weights, but adjust your hook size accordingly and expect the finished size to change proportionally. For tighter fabric, choose a slightly smaller hook than the yarn label suggests.
Do I need to use safety eyes or can I embroider them?
Both options work well. Safety eyes give a polished look but are not recommended for items for small children. Embroidered or crocheted discs are safer for toys and still look charming.
How much stuffing do I need for small details?
Very little — a small nose or pompom needs only tiny bits of fiberfill (a few grams). Avoid overstuffing to keep edges flat and simple to sew.
Can I make the square machine-washable?
If you use machine-washable acrylic yarn and secure all sewn pieces tightly, the square should withstand gentle machine wash. Fasten off ends securely and reinforce sewn pieces for durability.
How do I ensure the beard scallops look even?
Mark the lower half of the beard with pins or removable stitch markers before working shell stitches. Make each shell the same stitch count and block the beard to encourage even scallops.
What if my background square isn't perfectly square?
Blocking is usually enough to correct mild irregularities. Pin the square to a blocking mat and steam or spray lightly; reshaping the corners while damp will help them relax into a neat square.
Can I customize the colors?
Absolutely! Try different hat colors or skin tones for diverse Santas. You can also make a neutral-toned Santa for a vintage look. Swap white for cream for a softer beard effect.
This Santa Granny Square brings a little handmade holiday charm to your home with its friendly face and textured beard. It’s a fun, focused project that rewards careful shaping and neat assembly. Stitch by stitch you’ll see the character come alive — from the curled moustache to the tiny pompom tip. 🎅🧶 Display it as a mini wall-hanging or use as a seasonal potholder — either way it’s sure to bring smiles. Happy hooking and enjoy the festive finish! 🎁